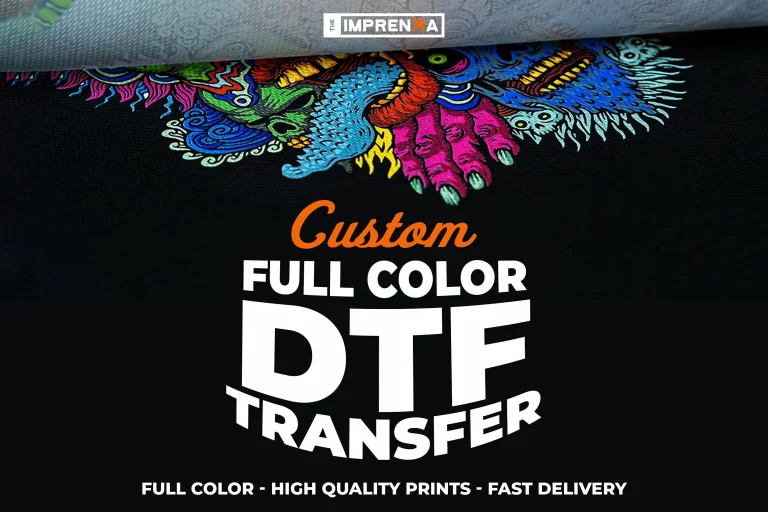
DIY DTF transfers: Tools, Supplies, and Home Setup
DIY DTF transfers empower creators to print vibrant designs on apparel from a home studio. If you’re curious about starting a small, at‑home transfer operation, this guide helps you choose the right tools and a practical workflow for a home studio setup. Key components include DTF transfer film, DTF ink and powder, and a compatible DTF printer that can produce bold colors on dark fabrics. Pair these with a heat press for DTF and a clean work area to achieve durable transfers with a soft hand feel. With a practical workflow, you can scale from hobby projects to a small home business while maintaining quality.
From an LSI-friendly perspective, at‑home textile decoration uses film-backed transfers produced with a color‑accurate printer and post‑print powder adhesion. This approach relies on a PET transfer film, quality inks with a compatible powder, and a reliable heat press to lock the design onto fabric. The workflow emphasizes careful color management, proper curing of the adhesive powder, and a tidy, ventilated workspace in your personal studio. Whether you call it do‑it‑yourself garment printing or home‑based DTF decoration, the core steps—design, print, powder, cure, and press—remain consistent across setups. By focusing on scalable tools like a beginner‑friendly printer, cost‑effective film, and an efficient curing and pressing plan, you can build a flexible, low‑overhead production at home.
DIY DTF Transfers at Home: Building Your First Efficient Workflow
DIY DTF transfers open a practical path to vibrant, professional-looking prints right in your own space. In a well-organized home studio setup, you’ll rely on essentials like the DTF transfer film, a capable DTF printer, and a reliable supply of DTF ink and powder to build a repeatable workflow. The aim is to achieve bright colors, soft hand feel, and durable results on a variety of fabrics, from cotton tees to tote bags, while keeping the process accessible for beginners and scalable for small runs.
A solid workflow starts with thoughtful design and color management. Prepare artwork with clear edges, calibrate your monitor with ICC profiles, and print a test piece to verify color accuracy and white ink coverage where needed. After printing, apply the adhesive powder evenly and cure it properly before pressing. The right heat press for DTF, combined with protective sheets, ensures uniform heat and pressure, producing crisp edges and strong adhesion without scorching the film.
Finally, create a clean, safe workspace that minimizes dust and humidity and supports efficient curing and finishing. Maintain your equipment with routine printhead cleaning and periodic calibration checks, store DTF transfer film and powder properly, and organize your tools for smooth, repeatable runs. With patience and careful note-taking, you can grow from hobbyist to steady home-based producer, delivering professional results across garments and fabric items.
Selecting Equipment for Professional-Looking DIY DTF Transfers: From Film to Finish
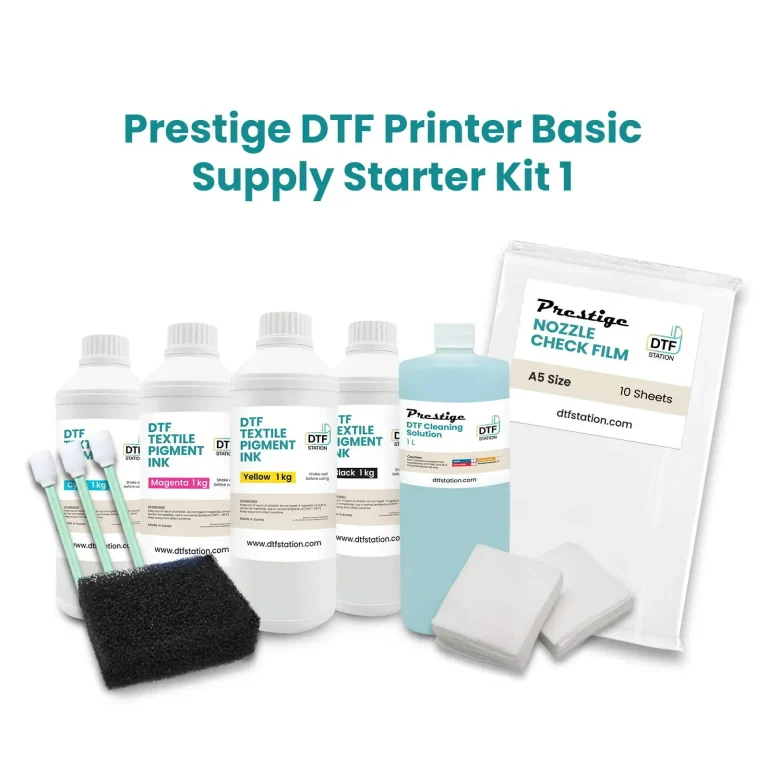
Choosing the right mix of tools is as important as the design itself. Start with a dedicated DTF printer that handles CMYK + white ink and offers reliable maintenance. Pair it with consistent DTF transfer film that prints cleanly and feeds smoothly, and stock up on high-quality DTF ink and powder to ensure vivid colors and strong adhesion. A reliable heat press for DTF with adjustable temperature, time, and pressure settings is essential to translate the print from film to fabric with consistent results.
As you assemble your setup, give attention to the entire film-to-fabric path. Consider how your DTF transfer film’s thickness and curl influence alignment, and how your powder curing step affects edge definition and durability. Build your home studio setup to minimize dust exposure, provide adequate ventilation for powders, and create a dedicated space for curing and pressing. Keep a simple calibration log for your presses and prints, and invest in protective sheets and heat-resistant mats to maintain a clean workflow.
Maintenance and safety should guide every choice. Regularly clean printheads, store films and powders properly, and stay vigilant about ventilation when handling powders. By aligning your equipment choices with a well-planned workflow—supported by a basic yet scalable home studio setup—you’ll achieve professional-looking results that are reproducible, easier to manage, and suitable for small business growth.
Frequently Asked Questions
What are the essential components for DIY DTF transfers in a home studio setup, and how do DTF transfer film, DTF ink and powder, and a DTF printer fit into the workflow?
Starting DIY DTF transfers in a home studio requires a focused toolkit. Core components include a DTF printer (CMYK plus white), DTF transfer film (PET film), DTF ink and powder (adhesive), a heat press for DTF, and protective sheets plus basic cleaning and workflow supplies. In practice: design the artwork, print with white ink where needed, apply the adhesive powder, cure the powder, align the film on the garment, and press at proper temperature, time, and pressure. To stay consistent, maintain a clean workspace, keep backup film and powder on hand, and document calibration notes for different fabrics.
How should I choose and use a heat press for DTF in a DIY DTF transfers workflow for a home studio setup?
Choosing and using a heat press for DTF is key to print quality in DIY DTF transfers. Look for an adjustable temperature, time, and pressure control, with a typical range around 160–180°C (320–356°F), dwell times of 10–20 seconds, and even, consistent pressure. Use a teflon or silicone cover sheet to protect the film and garment, and perform a pre‑press to remove moisture before applying the transfer. Align the film carefully, then press according to your film and powder manufacturer guidelines. Regularly calibrate pressure, run test on scraps, and keep the workspace clean and well‑ventilated in your home studio setup.
| Topic | Key Points | Practical Tips |
|---|---|---|
| Introduction / Overview | DIY DTF transfers enable at-home printing of vivid designs on apparel; focus on tools, supplies, and workflow. | Establish a dedicated home workspace; follow a repeatable process to build consistency. |
| Tools and Equipment You’ll Need | Core kit includes: DTF printer, DTF transfer film (PET), DTF ink and adhesive powder, heat press, protective sheets, cleaning supplies, and basic workspace accessories. | Start with essential items, then refine brands and add options as you scale; keep equipment organized and maintained. |
| Supplies and Consumables | DTF transfer film, ink, and powder directly affect quality; adhesives and curing aids influence durability and edge definition. | Label, stock, and rotate supplies; perform regular tests to confirm film, ink, and powder compatibility. |
| DTF Printer and Setup for Home Studios | Printer should deliver CMYK + white with reliable color management; ensure compatible inks and stable media handling; software with color profiles helps. | Maintain clean print heads; use ICC profiles; set up a dust-free, organized workspace; ensure proper curing area separate from printing. |
| The Role of the Heat Press and Press Settings | Typical temp: 160–180°C (320–356°F); dwell time: 10–20 seconds; uniform pressure; use protective sheets for clean edges. | Calibrate pressure, run small test prints, and keep a reference sheet for fabrics (cotton, blends, dark fabrics). |
| Creating a Functional Home Studio Setup | Space planning, ventilation, bright indirect lighting, cable management, logical workflow from design to cure. | Dedicated zones, good airflow, tidy surfaces, and routine cleaning and safety practices. |
| Design and Prepress | Design for print with margins, outlines; manage color with ICC profiles; handle white ink options and prepress tests. | Use vector files, convert fonts to outlines, soft proof, and test on scrap fabric before actual production. |
| Execution: From Print to Powder to Press | Sequential workflow: design to print, apply adhesive powder, cure, align, press, and peel; post-press if needed. | Document successful settings and adjust per fabric/film for consistency. |
| Troubleshooting and Maintenance | Common issues include faint colors, powder adhesion problems, dull transfers, ghosting, and surface imperfections. | Check ink levels, re-calibrate color profiles, adjust powder and curing, and test with different fabrics. |
| DTF vs Other Methods | DTF offers flexibility with dark fabrics, simpler color management, and broader fabric compatibility; trade-offs include cost and setup complexity. | Evaluate project type, volume, and budget when choosing between DTF, sublimation, or DTG. |
| Safety, Quality, and Long-Term Considerations | Ventilation, PPE when handling powders, safe chemical storage; invest in color management knowledge and material properties. | Follow manufacturer guidelines; maintain equipment; protect health and ensure durable results over time. |
Summary
DIY DTF transfers open a practical, scalable path for home-based apparel printing. With the right combination of DTF transfer film, inks, powders, a compatible printer, a reliable heat press, and an organized workflow, you can produce bright, durable designs on a range of fabrics from a dedicated home studio. The guide above outlines essential tools, consumables, and setup steps, plus troubleshooting and comparisons to alternative methods to help you build a repeatable process that yields professional-looking results. As you gain experience, refine your toolkit, document your settings, and stay curious about new films, powders, and printer capabilities to grow your at-home transfer operation into a small business.