DTF Gangsheet Builder: Step-by-Step Tutorial for Beginners
DTF Gangsheet Builder revolutionizes how you plan, preview, and optimize multiple designs on a single run. As a tool for DTF printing for beginners, it helps you arrange layouts, check margins, and visualize color reproduction before you hit the printer. This primer doubles as a DTF gang sheet tutorial and shows how to create a gang sheet efficiently. It also covers DTF transfer sheet setup and the essential steps to prep files, color profiles, and printing sequences. With clear visuals and practical checkpoints, the DTF printer guide provides you with time-saving tips to reduce waste and speed production.
Beyond the term gang sheet, this workflow embraces batch printing, multi-design layouts, and image tiling to maximize fabric coverage without sacrificing detail. Think of it as a planning canvas where you align artwork, margins, and color blocks on a single transfer sheet, then preview how each piece will look after the heat press. Using concepts like sheet organization, print-ready canvases, and transfer sheet setup considerations, the approach aligns with practical printer guidance and production efficiency. Understanding layout grids, safe zones, color profiling, and alignment helps you navigate software tools and refine your process over time.
DTF Gangsheet Builder: How to Create a Gang Sheet for Beginners
The DTF Gangsheet Builder is a game-changer for anyone following a DTF gang sheet tutorial. By centralizing layout, margins, and preview functions, it helps beginners visualize how multiple designs fit on a single transfer sheet and understand how to create a gang sheet from the start. This aligns with the goal of making DTF printing for beginners feel less overwhelming, turning a potentially complex task into a straightforward workflow.
Begin by defining your designs and target outputs. Gather your assets, set your sheet size, and choose a sensible resolution—300 DPI is a common starting point for good detail without exploding file sizes. Configure margins, bleed, and a grid or snapping guides to keep everything aligned. Import designs, arrange them with attention to spacing and color balance, and use the preview to verify margins and safe zones before exporting. These steps mirror essential elements of the DTF gang sheet tutorial and lay a solid foundation for how to create a gang sheet efficiently.
With the layout preview ready, export the file in a printer-ready format and save a project copy for future sessions. As you gain confidence, you can experiment with more complex arrangements, different garment sizes, and varied colorways while maintaining consistent quality. This practical workflow emphasizes how the DTF Gangsheet Builder supports a reliable, repeatable process for producing high-quality transfer sheets.
Maximizing Output Quality: Layout, Color Management, and Transfer Sheet Setup in DTF Printing
A core part of optimizing DTF printing is thoughtful layout and color management. By grouping designs with similar color tones and maintaining consistent spacing, you reduce color shifts and ensure cleaner transfers across batches. This focus on layout, margins, and safe zones aligns with the broader goals of a DTF printer guide and complements the practical steps outlined in the initial setup and preview phases.
Color profiles matter. Use a consistent workflow (often sRGB for web, adjusted for print as needed) and verify that RGB is preserved or properly converted for your printer. Before committing to a full run, perform a test print on a small section to confirm alignment and color accuracy. After printing, apply powder and cure thoroughly, then press carefully to transfer designs to fabric. Keeping a record of successful settings helps you reuse them for future runs, reinforcing the idea that careful transfer sheet setup and quality checks are central to a successful DTF printing process.
In practice, this approach supports ongoing improvement and scale. By saving multiple versions of gang sheets and documenting what works for different fabrics, you align with the DTF transfer sheet setup best practices and the broader DTF printer guide. The result is faster production cycles, less waste, and consistently reliable results that meet customer expectations.
Frequently Asked Questions
What is the DTF Gangsheet Builder and how does it help with DTF printing for beginners?
The DTF Gangsheet Builder is a dedicated layout tool that lets you place multiple designs on a single sheet, set margins and grid guides, and preview the final gang sheet before printing. For DTF printing for beginners, it reduces guesswork, improves layout accuracy, and helps maintain color consistency across designs. It also guides DTF transfer sheet setup by outlining safe zones, color blocks, and trimming considerations to minimize waste.
How to create a gang sheet using the DTF Gangsheet Builder and what is the best approach for DTF transfer sheet setup?
To create a gang sheet, define which designs to include, then use the DTF Gangsheet Builder to configure sheet size, resolution (often 300 DPI), margins, bleed, and a grid. Import and arrange designs with precise spacing, use the preview to verify alignment, then export a printer-ready file. Finally, follow the DTF transfer sheet setup during printing—powdering, curing, and heat pressing—to ensure clean transfers and consistent results.
| Aspect | Key Points |
|---|---|
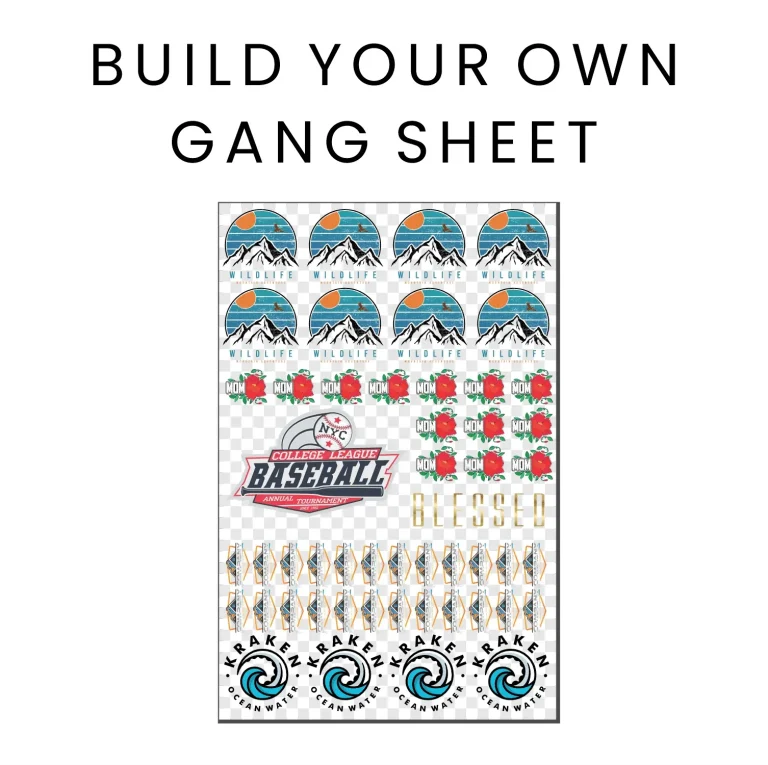
| Definition | A gang sheet prints multiple images on one sheet to improve production efficiency, reduce material waste, and help maintain consistent color and quality across orders. |
| What is the DTF Gangsheet Builder | A layout assistant that lets you place designs, set margins, adjust spacing, and preview the final sheet to guide beginners toward a printable, transfer-friendly layout. |
| Prerequisites | Assets: high‑resolution PNG/TIFF with transparency when appropriate; target garment sizes; printer, DTF film, and the DTF Gangsheet Builder; color profiles; clean workspace and heat press. |
| Step 1 – Define designs | Choose which designs will appear; start with 6–12 designs to learn without overwhelm; consider design sizes, color considerations, product mix, and seamless workflows; don’t commit to final placements yet. |
| Step 2 – Prepare assets & grid | Set sheet size, resolution (300 DPI for beginners), margins/bleed, and grid/snapping guides; use the preview to confirm alignment with printer capabilities. |
| Step 3 – Import & arrange | Import designs, place them on the sheet, center/edge placement, align with grid, rotate if needed, group similar colors, and add placeholders; start simple and iterate. |
| Step 4 – Preview & export | Use preview to verify margins, safe zones, color profiles, and transparency; ensure readable text; export high-quality PNG/TIFF and save the project. |
| Step 5 – Print & apply | Perform a test print, adjust printer settings as needed; apply powder and cure; transfer with correct pressure/time; document successful settings for future runs. |
| Step 6 – Finish & assess | Trim excess material, check color accuracy and texture, evaluate garment feel, and refine layouts to reduce waste for future runs. |
| Tips | Start small, maintain consistent color profiles, save multiple versions, test on the same fabric, and watch for edge artifacts. |
| Why use the DTF Gangsheet Builder | Offers a guided workflow to visualize layouts, ensure margins, and produce reliable print-ready exports; scalable for complex layouts and large batches while preserving quality. |
Summary
Conclusion: