DTF printing tutorial for beginners: startup guide
DTF printing tutorial offers a practical, beginner-friendly doorway into direct-to-film transfers, guiding you from setup to final results with clear explanations of what the process is, why it’s popular, and how to approach your first project. If you’re new to decorating shirts, hoodies, and fabrics, this guide is a friendly introduction to DTF printing for beginners, highlighting typical workflows, expected results, and common mistakes so you can build confidence quickly. You’ll learn the essentials—from choosing the right equipment to mastering the heat press technique and, importantly, how to do DTF printing efficiently in a small shop or home studio. The tutorial also points you toward practical decisions about DTF printer setup and the best practices for powder coating, curing, and DTF transfer printing techniques, including a concise DTF heat press guide for different garment types. With hands-on steps, checklists, and troubleshooting tips, you’ll finish the first module ready to plan projects, optimize throughput, and scale your DTF printing capabilities with confidence.
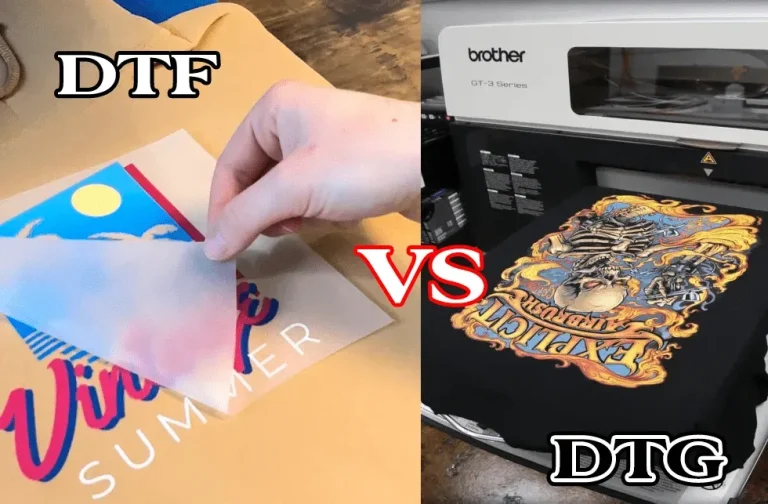
In alternative terminology, the process is a direct-to-film workflow, a film-to-textile transfer method that prints vivid designs on PET film and then bonds them to fabrics with heat and pressure. From a reader-friendly perspective, this approach can be described as a film-based garment decoration technique that combines digital color work with a durable, soft hand on a range of fabrics. By thinking in these LSI-inspired terms—direct-to-film, film transfer, or textile print via PET media—you’ll connect the concept to related topics like ink physics, substrate prep, and post-transfer care.
DTF printing tutorial: A Beginner’s Roadmap to Direct-to-Film Success
This DTF printing tutorial is designed for newcomers who want a practical, step-by-step path into direct-to-film transfers. It covers the basics of what DTF printing is, why crafters and small businesses are turning to this method, and how to approach learning with a clear plan. If you’re exploring options like DTF printing for beginners, this guide provides a grounded overview of the workflow from design to transfer.
For those asking how to do DTF printing, this section sets expectations about the learning curve and essential milestones. You’ll see how to approach equipment setup, file preparation, and the basic transfer sequence. The goal is to give you concrete starting points so you can build momentum without feeling overwhelmed, while keeping the process accessible and scalable.
Why DTF printing is popular for beginners and small businesses
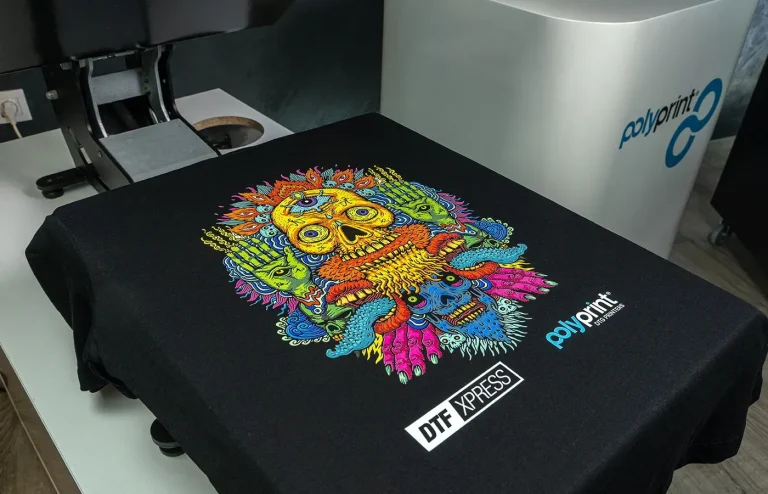
DTF transfer printing is appealing because it supports vibrant full-color designs on a wide range of fabrics, including dark garments, with a soft hand after transfer. This aligns with the needs of beginners who want reliable results without complex layering or long setup times, making DTF printing for beginners a practical option for hobbyists and small shops alike.
From a business perspective, DTF printing offers flexibility, cost-efficiency for short runs, and the potential for diversified product lines. This popularity is driven by consistent results, relatively straightforward workflows, and the ability to experiment with multi-color designs that contrast well on both light and dark textiles.
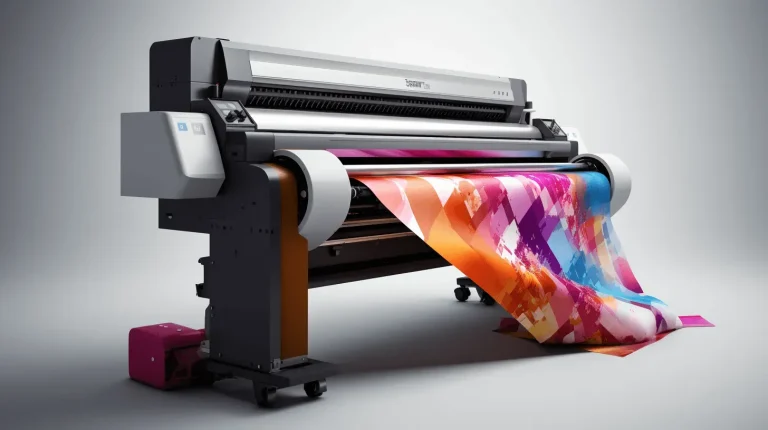
DTF printer setup and essential equipment for success
A solid DTF printer setup starts with a capable CMYK white ink system and PET films designed for DTF transfers. Beyond the printer itself, gather adhesive powder, a reliable curing method, a heat press capable of handling multiple garment sizes, transfer sheets, and a clean workspace. This kit forms the foundation for smooth operation and repeatable results.
In addition to hardware, you’ll need RIP software or printer drivers configured for DTF output and a method to manage color consistency. Regular maintenance, such as nozzle checks and printhead cleaning, helps prevent downtime and keeps color density and edge quality stable across jobs.
Artwork and color management for crisp DTF transfer printing
Successful DTF transfer printing starts with strong design prep. Work with vector or high-resolution raster art, apply a CMYK color profile, and test print to verify color accuracy. If printing on dark fabrics, include a white underbase to preserve vibrancy, and save files in PNG or TIFF formats to preserve transparency for layering.
Color management is central to achieving predictable results. Use calibrated monitors, proof colors, and small test swatches on fabrics similar to your main products. This approach—often summarized in active DTF workflows—helps you refine color relationships, ensure clean edges, and minimize edge halos before committing to larger runs.
From film to fabric: The transfer process and heat pressing
Prepare the printed PET film by curing the adhesive powder and removing any excess powder in a dust-free environment. The transfer step then aligns the film to the garment, paying close attention to placement and registration. Preheating the heat press to the recommended temperature, typically around 160–170°C (320–340°F), sets the stage for a strong, durable bond.
During the transfer, maintain steady pressure and consistent timing to avoid scorching or incomplete adhesion. After pressing, allow the design to cool briefly before removing the film carrier. If you notice a pale transfer or stiffness, you can tweak the heat, time, or pressure in subsequent runs, following a methodical DTF heat press guide to refine your results.
Troubleshooting, QA, and scaling your DTF operation
Common issues like white ink opacity, powder adhesion problems, or edge ghosting can disrupt a transfer. When white areas look translucent, increase white ink density or adjust the white pass in your RIP settings and run a calibration test. If powder isn’t adhering, re-check the curing process and ensure even distribution of adhesive powder.
To maintain quality and scale effectively, keep thorough notes on every test print—record temperatures, times, fabric types, and powder brands. Establish best practices for garment selection, storage of films and powders, and a reproducible workflow that supports more ambitious projects. As you gain confidence, you can expand your offerings and streamline production with a structured DTF transfer printing setup.
Frequently Asked Questions
What is a DTF printing tutorial for beginners and what will I learn from it?
A DTF printing tutorial for beginners introduces direct-to-film transfers and the essential steps to get reliable results. It covers choosing equipment, preparing artwork, printing on PET film, applying and curing adhesive powder, transferring with a heat press, and basic troubleshooting. By following the guide, you’ll plan projects, diagnose issues, and scale your setup over time.
How to do DTF printing in a step-by-step way, as outlined by a DTF printing tutorial?
To do DTF printing, start with clean artwork and proper color management. Print on PET film (white ink first, then colors), then apply and cure the adhesive powder. Transfer the design to fabric with a heat press at about 160–170°C (320–340°F) for 10–20 seconds, let it cool, and peel the film carrier carefully.
What equipment do I need for DTF printer setup and how should I configure it?
For DTF printer setup, you’ll need a DTF printer with CMYK and white ink capability, suitable PET films, adhesive powder and a curing system, a reliable heat press, transfer sheets, and a RIP or printer driver configured for DTF output. Ensure proper calibration (ink density, white pass) and keep software profiles aligned with your substrates.
DTF heat press guide: what temperature, time, and pressure should I use?
DTF heat press guide recommendations are to pre-press the garment, then press at about 160–170°C (320–340°F) with steady pressure for 10–20 seconds. Use a protective sheet as needed, and adjust time and pressure based on garment thickness and film. Always test on similar fabrics before larger runs.
What common issues occur in DTF transfer printing and how can I troubleshoot them?
Common issues include white ink opacity problems, powder not adhering, film edge ghosting, and colors washing out after wash. Troubleshoot by increasing white ink density or ensuring a robust white pass, verifying proper curing and even powder distribution, checking alignment and pressure during transfer, and following garment care recommendations to preserve the print.
How can I optimize my DTF printer setup for beginners to get consistent results?
Optimize a DTF printer setup by creating a dust-free workspace, performing regular printer cleaning and nozzle checks, and using color-managed proofing with test swatches on fabrics similar to your products. Keep a log of settings for different substrates and powders, and calibrate the heat press periodically to maintain consistency.
| Section | Key Points | Notes / Details |
|---|---|---|
| Introduction | Beginner-friendly guide to DTF transfers; overview of what DTF is, why popular, and how to achieve reliable results. | Covers planning, troubleshooting, and scaling your setup from basic to more advanced projects. |
| What is DTF Printing and Why It’s Popular | DTF stands for direct-to-film; prints on PET film, transfers via adhesive powder and heat; full-color capability; soft hand on a variety of fabrics; beginner-friendly due to straightforward workflow. | Great for cotton, blends, dark garments, and versatile for beginners. |
| Essential Materials and Equipment | Printer with CMYK + white ink; PET films; adhesive powder; heat press; transfer sheets; dust-free workspace; powder removal tool; RIP software; garments. | The list helps ensure you have all core items before starting. |
| Designing and Preparing Artwork | Vector or high-res artwork; CMYK color profile; white underlayer for dark fabrics; whitespace reduces edge halos; save as PNG/TIFF with transparency; organize test-print folder. | Refine color and file organization for iterative testing. |
| Printing the Design on PET Film | Print white layer first for opacity; adjust density and drying time; inspect for smudges or misregistration; proceed to adhesive powder step. | Ensure accurate alignment and opacity before powdering. |
| Powder Coating and Curing | Dust adhesive powder; avoid dust; cure powder per guidelines; conduct test runs to dial timing. | Curing fixes powder onto film for reliable transfers. |
| Preparing for Transfer: From Film to Fabric | Shake off excess powder; place film on garment with design facing up; preheat heat press to 160–170°C; apply 10–20 seconds; bond adhesive; avoid scorching. | Adjust time/temperature based on garment and film thickness. |
| Transferring the Design to the Garment | Keep garment flat and aligned; use protective sheet if required; cool briefly before removing carrier; if transfer looks pale, adjust heat/time/pressure next run. | Aim for vibrant, durable results with minimal edge halos. |
| Careful Troubleshooting and Common Issues |
|
Keep notes of temperature, time, pressure, fabric type, powder brand for reference and reproducibility. |
| Optimizing Your Setup for Beginners |
|
A clean, calibrated environment yields consistent results. |
| Project Planning and Cost Considerations | ROI-focused: start small, plan budgets for consumables and maintenance; estimate cost per shirt, time per print, and margins. | Track expenses and expected returns as you scale. |
| Best Practices for Quality and Longevity | Use high-quality garments; align designs to avoid misregistration; pre-press garments; store films/powders properly; maintain records of settings. | Documentation supports reproducibility and long-term success. |
Summary
DTF printing tutorial provides a practical, beginner-friendly pathway into direct-to-film transfers, offering a descriptive overview of planning, design, equipment, and workflow steps. In this guide, you’ll learn how to choose materials, prepare artwork with color management, print on PET film, coat with adhesive powder, transfer to fabric, and troubleshoot common issues. With careful testing, documentation, and iterative adjustments, you can build a reliable, scalable DTF printing setup and begin producing vibrant, durable transfers on a variety of fabrics.