DTF transfers: Complete beginner’s guide to Direct-to-Film
DTF transfers have transformed garment decoration, delivering a flexible, durable way to apply vibrant designs across a wide range of fabrics, from everyday tees to performance textiles, with strong wash-fastness and color retention. As a form of Direct-to-Film printing, it blends color richness with fabrication versatility, enabling easy setup, quick color changes, scalable runs, and even a DTF transfer tutorial to help newcomers understand best practices, cost implications, and practical expectations. If you’re looking for a How to apply DTF transfers guide, this article breaks down the steps in clear, practical terms, includes troubleshooting tips, and points you toward reliable equipment and supplier choices. For newcomers, we compare DTF printing for beginners with traditional methods to highlight its advantages and limitations, discussing cost, simplicity, durability, and how it fits into small home studios or growing online shops, plus practical tips on pre-press testing, fabric selection, and workflow optimization for beginners and seasoned makers alike. A quick comparison of DTF vs screen printing helps you pick the right tool for small runs, vibrant images, and diverse fabrics, while outlining the tradeoffs in setup time, ink handling, and post-transfer care, helping you set clear expectations for your first project and communicate the value of the method to clients.
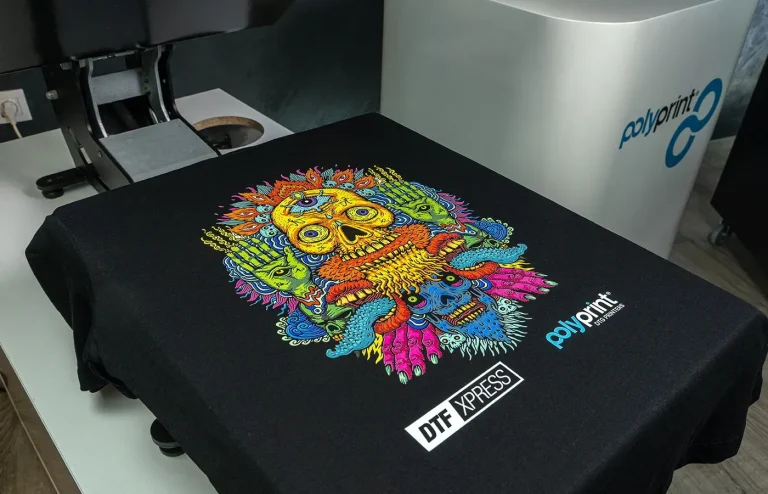
Seen as a film-to-fabric transfer, this Direct-to-Film approach is a versatile print-on-fabric technology that applies full-color designs to textiles via a printed sheet, adhesive powder, and heat. Key elements include the PET transfer film, powder adhesive, a curing step, and a well-tuned heat press, all of which combine to deliver durable color on cotton, blends, and synthetic fibers. For beginners and small studios, the appeal lies in low setup costs, easy experimentation with color, and the ability to produce short runs without incurring the high upfront fees of traditional methods. As you compare options, consider LSI-related terms such as direct-to-film printing, dye-sub alternatives, and garment decoration strategies to choose the best fit for your designs, budget, and turnaround needs.
DTF Transfers Explained: Direct-to-Film Printing Essentials
DTF transfers are printed designs on a special PET film that are later transferred to fabric using heat and pressure. This approach, known as Direct-to-Film printing, blends the flexibility of print with the broad fabric compatibility that many small businesses crave. By printing a full-color image on film and then applying a specialized powder and heat, designers can decorate everything from 100% cotton tees to poly blends with bright, durable color.
Because Direct-to-Film printing works across a wide range of fabrics, you can move from concept to finished garment without the heavy setup costs of traditional screen printing. For beginners, a practical DTF transfer tutorial can translate the science into hands-on steps, helping you understand ink behavior, film quality, and how to optimize adhesion through powder curing and precise heat pressing.
DTF vs Screen Printing: When to Choose Direct-to-Film for Small Runs
DTF vs Screen Printing: When to Choose Direct-to-Film for Small Runs. For small batch projects with many colors and intricate details, DTF transfers often offer lower setup costs and faster turnaround compared with traditional screen printing. Screen printing requires creating a dedicated screen for each color, which becomes expensive and time-consuming when the run is short, while DTF lets you print a complete design in a single pass and produce ready-to-press sheets.
DTF printing for beginners benefits from this balance of flexibility and efficiency, as you can test layouts and iterate between color proofs and final transfers. When evaluating your options, compare setup costs, per-unit pricing, wash-fastness, and the ability to print on blends or poly fabrics. A practical approach is to start with a simple two-color design on cotton and then scale to more complex pieces if demand grows.
DTF Transfer Tutorial: A Step-by-Step Practical Guide
This DTF transfer tutorial is designed to demystify the process for newcomers. We’ll walk through the core steps—design, printing on PET film, powder coating, curing, and transferring with a heat press—so you can complete your first project with confidence. Each stage has critical details that affect durability, color accuracy, and alignment, making careful attention and documentation essential.
From Step 1 to Step 4, a practical project emphasizes consistency: stable room temperature, clean surfaces, and precise timings. Keeping a log of printer settings, film type, powder batch, and press temperature helps you reproduce reliable results and reduces trial-and-error during future runs.
How to Apply DTF Transfers: Techniques for Fabrics
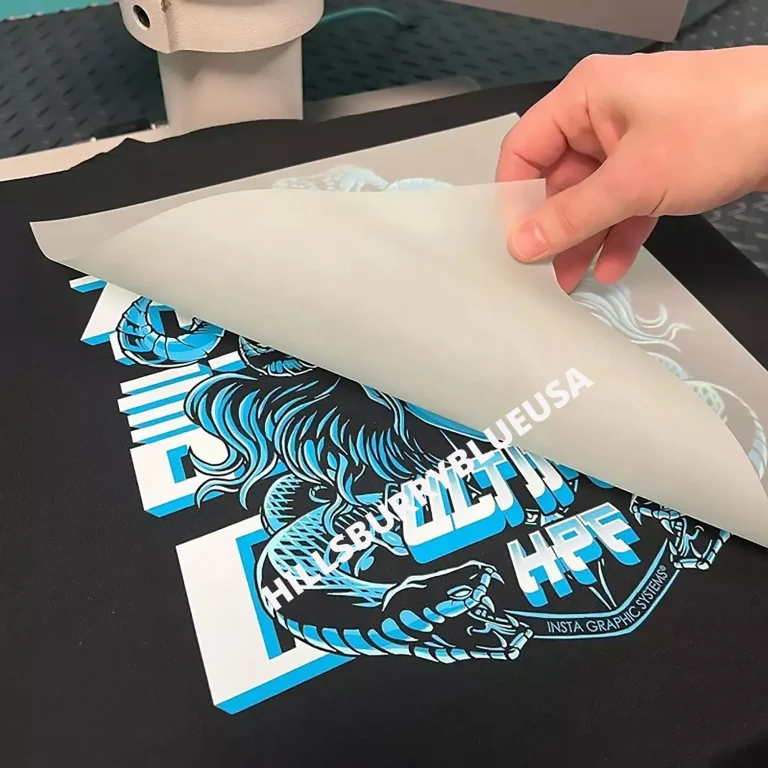
Applying DTF transfers to different fabrics requires small adjustments to heat, time, and pre-treatment. On cotton, you’ll often see the strongest adhesion and color fidelity, while blends may need slight tweaks to curing time or temperature to avoid edge cracking or surface texture issues. For polyester, pre-pressing to remove moisture can improve tack and reduce puckering during transfer.
Throughout, testing on small swatches is a practical habit for beginners learning how to apply DTF transfers across fabrics. Follow the film supplier’s instructions for peel strategy—warm or cold peel—and keep notes on how variations in fabric weight or weave influence final feel and wash durability.
DTF Printing for Beginners: Essential Materials, Setup, and First Projects
A solid beginner setup starts with a reliable printer capable of pigment or water-based inks, PET transfer film, DTF adhesive powder, a coating or shaker device, a dedicated curing unit, and a precise heat press. Start with basic cotton tees and plain fabrics to learn the workflow before expanding to blends or dark colors. Document recommended settings and maintain a clean workspace to reduce errors.
Your first project can be a simple two-color design with a straightforward layout, then you can grow to higher-detail pieces as you gain experience. Use the DTF printing for beginners mindset to test color accuracy, powder distribution, and curing parameters, and gradually scale up by adding more colors, files, or batch sizes as demand arises.
Care, Maintenance, and Troubleshooting for DTF Transfers
Post-transfer care is essential to maximize longevity. Allow the garment to cool, then perform wash tests to validate colorfastness. Most DTF transfers withstand multiple cycles when properly cured, but aggressive washing or hot dryers can gradually fade colors. Provide clear care instructions to customers to help extend the life of each design, and store transfer sheets and finished products in a clean, dry space.
Common issues like color mismatch, edge cracking, or peeling often stem from incomplete curing, unequal powder coating, or poor heat transfer. Keep a simple job log with film type, powder brand, temperature, and press time to detect patterns and refine your process. Regular maintenance of your printer, film, and heat press—calibrating temperatures and inspecting seals—reduces downtime and improves consistency.
Frequently Asked Questions
What is Direct-to-Film printing and how do DTF transfers work?
Direct-to-Film printing is the process of printing designs onto a PET film, which is then heat-transferred to fabric as a DTF transfer. The typical workflow includes printing on the film, applying an adhesive powder, curing the powder, and pressing the film onto the garment with a heat press. This method delivers bright color reproduction and strong adhesion across a wide range of fabrics, making it popular for small runs and on-demand projects.
How to apply DTF transfers to fabric?
To apply DTF transfers, start with a clean, wrinkle-free fabric and pre-press to remove moisture. Position the powder-coated film on the fabric with the printed side facing down. Use a heat press at the recommended temperature (often around 320–340°F / 160–171°C) for 12–20 seconds with even pressure. Remove the film while it’s still warm (or cold, per film instructions) and allow the garment to cool before handling.
DTF transfer tutorial for beginners: what should you know?
A DTF transfer tutorial guides you through design, printing on PET film, powder coating, curing, and transferring. Key tips include maintaining stable room temperature, clean surfaces, and consistent timings to improve results. Practice on small test sheets, log the settings that work best with your printer and film, and gradually scale up as you gain confidence.
DTF vs screen printing: what are the key differences?
DTF transfers excel for short-run jobs and designs with many colors or fine detail, and they work on a wide range of fabrics. Screen printing is most economical for large-volume orders with fewer colors but requires screen production and setup. In practice, choose DTF for flexibility and quick setup on diverse fabrics, and screen printing for high-volume, simple-color designs.
DTF printing for beginners: which fabrics work best to start with?
Begin with plain cotton tees for reliable, straightforward results. DTF printing also works on poly-cotton blends and some polyesters, but performance varies by fabric; always test on swatches and consider pre-washing. Starting with cotton helps you learn handling, pressing times, and temperature adjustments before moving to blends or darker fabrics.
Are DTF transfers durable and how should I care for them?
Durability depends on proper curing and pressing. When done correctly, DTF transfers can withstand many wash cycles. For best longevity, wash garments inside out, use mild detergents, avoid high-heat drying, and air-dry when possible; provide clear care instructions to customers to maintain color and adhesion.
| Topic | Key Point | Summary |
|---|---|---|
| What are DTF transfers? | Printed on PET film and transferred with heat | DTF transfers are designs printed on PET film and applied to fabric via heat press. |
| Why popular? | Fabric versatility, bright colors, small-batch-friendly, low setup costs | DTF works on many fabrics, offers vibrant color reproduction, and is cost-effective for small runs. |
| DTF workflow overview | Design, print on film, apply powder, cure, transfer | A clear sequence that affects print quality and durability. |
| Materials & equipment | Printer, PET film, adhesive powder, shaker, dryer/oven, heat press | Essential components; start with a basic setup and scale up as needed. |
| DTF vs other methods | Advantages for short runs and detail; compares to screen printing and DTG | DTF combines detailed color with fabric versatility; DTG excels on 100% cotton but struggles on blends. |
| Fabric compatibility | Cotton, poly-cotton blends, and some polyesters; test first | Broad suitability; plan tests and consider pre-washing or treatments. |
| Step-by-step tutorial overview | Core steps; consistency matters | Walkthrough covers design considerations, printing, coating, curing, transferring; maintain stable conditions. |
| Adapting to different fabrics | Cotton strongest adhesion; blends require tweaks; polyester may need moisture removal | Adjust curing temps/times; test with swatches. |
| Troubleshooting | Color transfer issues, lift, edge cracking | Check film quality, powder, and curing; ensure flat pressing; log parameters to improve results. |
| Care & maintenance | Post-transfer care; washing guidelines | Follow washing guidelines, inside-out washing, mild detergents; store transfer sheets properly to prolong life. |
Summary
DTF transfers offer a versatile, scalable path for decorating textiles with vibrant, durable designs. By understanding the Direct-to-Film workflow, selecting compatible materials, and following proven steps from design to heat pressing, beginners can produce professional results without the high setup costs of traditional printing. With careful testing across fabrics, proper care, and attention to detail, DTF transfers enable small runs, customization, and efficient production for a wide range of garments and textiles.