DTF transfers production: Artwork to Final Garment Mastery
DTF transfers production has reshaped how apparel brands convert digital artwork into wearable products and opened new avenues for customization. From small shops to large production lines, mastering the end-to-end process ensures color accuracy, durability, and efficient throughput. In this guide, we explore the core steps from artwork to garment workflow and highlight practical techniques across key areas like the DTF transfer process and Direct-to-film transfers. Understanding these elements helps teams consistently deliver high-quality DTF transfers on a range of fabrics while aligning with garment printing best practices. By focusing on preparation, production, and post-press finishing, you can optimize color fidelity and wash performance from the first batch onward.
Viewed from another angle, the same process is a film-based garment decoration method that moves a printed design from a transfer film to fabric using heat and pressure. Common terms you might encounter include film-based textile transfer, ink-on-film technique, and heat-press garment graphics, all pointing to the same core workflow. This broader vocabulary aligns with LSI principles by linking related concepts such as color management, substrate compatibility, and post-press curing to the overall process. By recognizing these alternative terms, readers can explore practical guidance on artwork preparation, equipment calibration, and quality control across fabrics.
DTF transfers production: Mastering the artwork to garment workflow for durable, color-accurate results
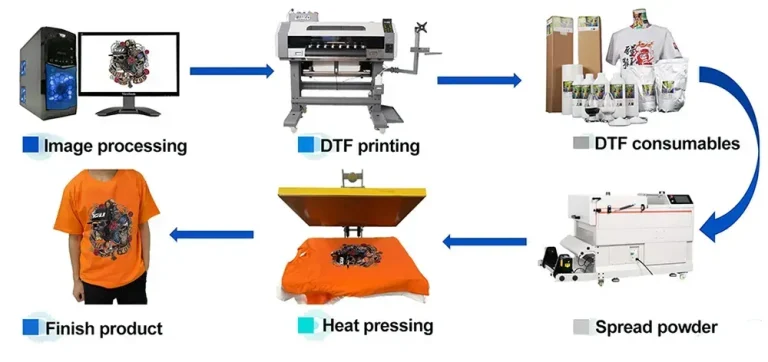
DTF transfers production starts with a clear handoff from artwork to garment workflow, ensuring the digital design translates to fabric with faithful color and detail. The core stages—DTF printing techniques on a PET film, followed by adhesive powder application and curing, then a precise heat press—create a robust path from artwork to wearable product. A well-executed DTF transfer process yields vibrant color, soft hand feel, and wash resistance when every parameter is tuned for the fabric.
Preparing artwork for film requires high-resolution files, CMYK color management, and a white underbase strategy for light fabrics. The artwork to garment workflow benefits from test swatches on representative fabrics to anticipate color shifts intrinsic to film-based transfers. Calibration against Pantone spot colors, clear vector elements, and mindful trimming of sharp edges reduce surprises in production and speed throughput.
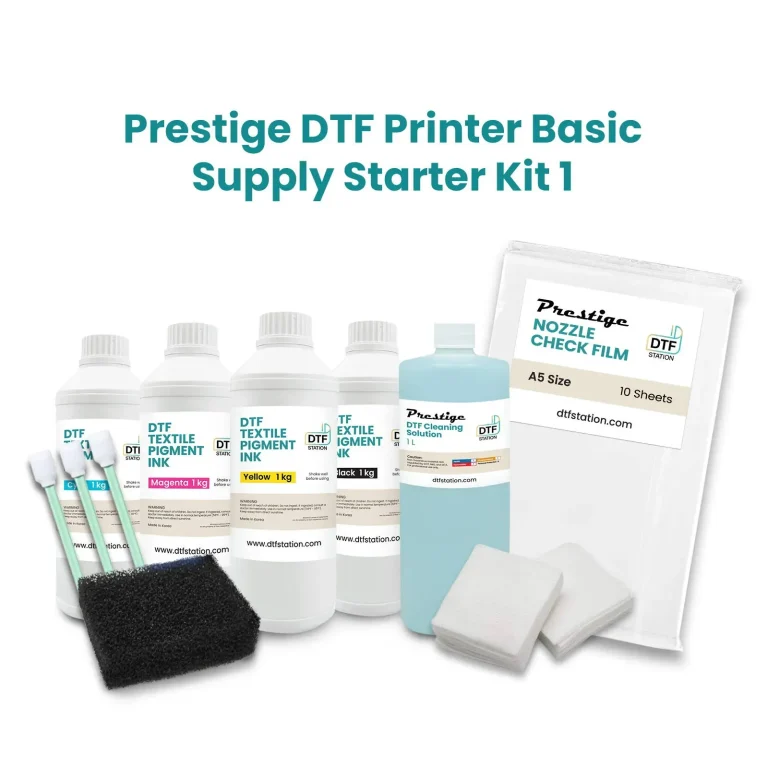
Operational best practices for DTF transfers production include consistent powder application, accurate curing, and controlled press conditions. Adhere to recommended temperature and time targets, typically around 170–180 C for 15–20 seconds for cotton, with adjustments for fabric weight. Regular quality control checks—color fidelity, edge definition, adhesion, and soft hand feel—help maintain repeatability across runs and fabrics.
DTF printing techniques and Direct-to-film transfers: Scaling with robust workflow and garment printing best practices
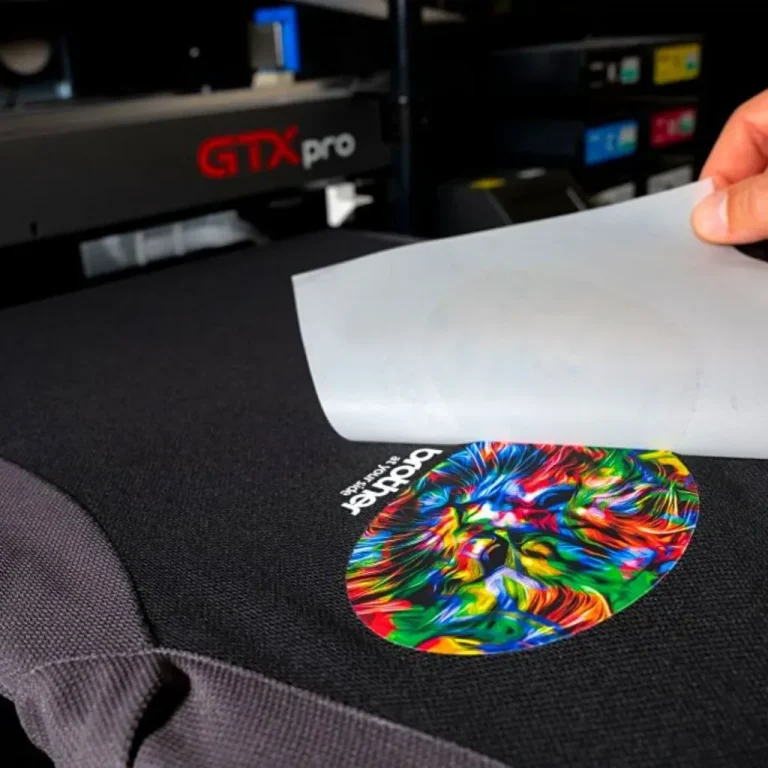
DTF printing techniques enable sharp detail and broad color on multiple fabrics through Direct-to-film transfers, where the image is printed on PET film with white ink backing, a powder adhesive is applied, then cured before transfer. The DTF transfer process relies on precise temperature, time, and pressure to bond the print to the garment, delivering strong wash durability and a soft hand on cotton and blends.
A scalable workflow requires standardized settings by fabric type, careful prepress proofs, and reliable equipment maintenance. The artwork to garment workflow should be established as a repeatable recipe: file preparation, color management, film handling, powder distribution, curing, and press parameters; documenting these steps supports consistent outcomes across batches and operators. Garment printing best practices emphasize clean workstations, routine calibration, and quality checks at each stage.
Fabric variation demands proactive testing—test swatches on dark, light, and synthetic fabrics to confirm opacity, vibrancy, and adhesion. High-contrast designs benefit from adequate white underbase where needed, and fast-drying adhesives reduce transfer time. By aligning DTF printing techniques with the garment types you serve, teams can optimize throughput and reduce rework, while keeping color fidelity close to the original design.
Frequently Asked Questions
What is the DTF transfers production workflow from artwork to garment, and which steps in the artwork to garment workflow most impact color accuracy and throughput?
DTF transfers production follows a clear artwork to garment workflow: prepare a high-resolution design (ideally 300 dpi at print size) with CMYK color management and Pantone spot colors as needed, plan for a white underbase on light fabrics, and test proofs on the target fabric. The film printing stage uses a PET film with appropriate inks, including white for opacity on dark fabrics. After printing, apply the adhesive powder evenly, cure until the powder is dry to touch, and then transfer the print to the garment under controlled temperature, time, and pressure. Throughout, run prepress proofs and test swatches to verify color fidelity, adhesion, and fabric hand feel, and document settings to reproduce results consistently across batches.
What are the Garment printing best practices for DTF transfers production to ensure color fidelity and durable finishes across the DTF transfer process?
Key garment printing best practices for DTF transfers production start with standardized prepress proofs and color-managed artwork, then calibrate printers regularly to maintain consistent output. Ensure uniform adhesive powder application and a robust curing step, followed by precise transfer settings (temperature, time, pressure) tailored to each fabric type. Conduct test transfers on representative garments, check for color accuracy against proofs, confirm strong adhesion after washing, and verify a soft hand feel. Document per-fabric transfer parameters, maintain equipment cleanliness, and invest in reliable heat presses and a stable workspace to minimize variability across runs.
| Key Topic | Main Point |
|---|---|
| Introduction |
DTF transfers production begins with a digital design and ends with a wearable garment via printing on a PET film, applying an adhesive powder, curing, and heat pressing. When done correctly, the result is vibrant colors, soft hand feel, and strong wash resistance. |
| End-to-end workflow |
Understanding the end-to-end workflow is foundational: select the right color palette and ensure proper resolution during artwork preparation, print the design to film carrying both imagery and adhesive, transfer the film to fabric under controlled heat and pressure, and complete finishing steps to seal and prepare the garment for packaging and sale. |
| Artwork preparation and color management |
|
| Film printing and the DTF transfer process |
|
| Adhesive powder and curing strategy |
|
| The transfer press: turning film into fabric |
|
| Quality control and troubleshooting |
|
| Fabric variety and design considerations |
|
| Comparisons and best practices |
|
Summary
DTF transfers production represents a capable, flexible path for turning artwork into durable, high-quality garments. By focusing on artwork preparation, film printing, adhesive curing, precise transfer parameters, and diligent quality control, you can build a repeatable process that scales from small runs to larger batches. While it is not a one-size-fits-all solution, the DTF transfer workflow offers an appealing balance of color fidelity, texture, and throughput for many apparel businesses. As you continue refining your process, remember that the key to success lies in systematic testing, careful documentation, and a willingness to adapt settings to the fabrics you work with. By embracing these practices, your team can consistently achieve strong results in DTF transfers production and deliver great-looking garments that wear well over time.