Texas DTF transfers: A Step-by-Step Guide for Beginners
Texas DTF transfers offer a powerful, beginner-friendly way to add vibrant, full-color designs to fabrics. Designed for DIY DTF printing enthusiasts, this method delivers sharp images, soft hand feel, and durable results on cotton and poly blends. If you’re just starting, these DTF transfers for beginners guide you through design, printing, curing, and transferring with practical tips. You’ll also learn how to apply DTF transfers and avoid common mistakes, with DTF transfer tips and troubleshooting steps. With a focus on accessible equipment and on-demand experimentation, this guide helps you produce high-quality designs right from your home.
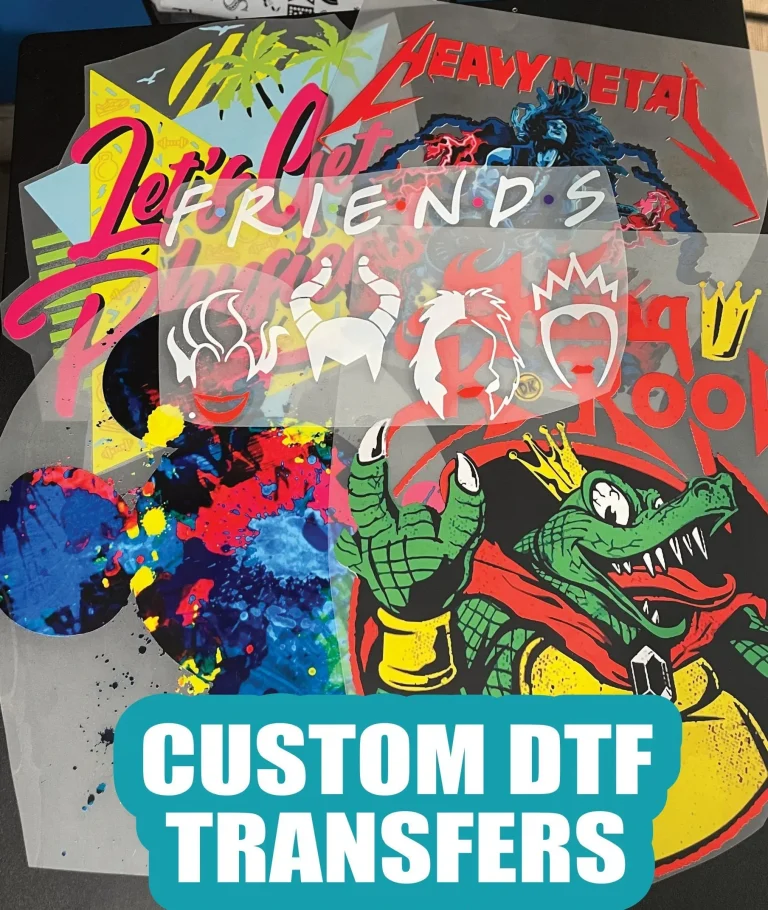
Direct-to-film or film-based transfers, also known as direct-to-film prints, offer the same core concept with different terminology. This approach uses a printed film coated with adhesive powder, then pressed onto fabric to produce bright, durable results. In this sense, Texas DTF transfers can be described using alternative terms that emphasize the workflow, materials, and outcomes—such as DTF printing on textiles, adhesive-coated film transfers, and heat-press ready designs. By framing the topic with related concepts like color fidelity, soft hand, and on-demand customization, beginners can see how the method fits alongside other garment-printing options without getting overwhelmed.
Texas DTF Transfers: A Beginner-Friendly Path to Vivid Garments
Texas DTF transfers bring a color-rich, soft-hand finish to fabrics, with a workflow that suits beginners. The process starts with printing a design onto a transparent film using an inkjet printer compatible with DTF film and, when needed for opacity on darker fabrics, a white ink layer. After printing, the film is coated with an adhesive powder and cured to fix the ink to the film. When pressed with a heat press, the design transfers cleanly to cotton and poly blends, delivering sharp images that endure wash after wash. This approach aligns with DIY DTF printing and can be implemented at home with careful attention to temperature, time, and pressure.
For beginners, the Texas DTF transfers workflow offers repeatable steps—design, print, powder, cure, brush off excess, press, and post-press cure. Start with a simple design, mirror it for transfer, and test on inexpensive blanks to calibrate color and opacity, especially when dealing with white ink on dark fabrics. Calibrating color, maintaining a clean workstation, and following manufacturer guidelines on heat and timing help minimize common issues. As you gain experience with Texas DTF transfers, you’ll appreciate how this method balances cost, flexibility, and speed for small runs or on-demand printing.
DTF Transfers for Beginners: From Setup to Successful Finishes
Setting up for DTF printing involves choosing the right film, adhesive powder, and a compatible heat source. Gather design software, a printer with white ink capability if needed, and a curing option to fix the powder before transfer. The step-by-step method emphasizes using a print-ready file, aligning artwork, and keeping a clean workspace to prevent dust from ruining a film. The goal is to make DIY DTF printing approachable, with clear, repeatable parameters you can rely on, especially when learning how to apply DTF transfers.
During practice, focus on stable heat press settings, consistent pressure, and proper post-press finishing to enhance durability. Troubleshooting tips cover incomplete adhesion, color shifts, or white ink coverage issues, with practical DTF transfer tips such as double-checking curing, testing on light versus dark fabrics, and ensuring correct peel methods. Maintain care by washing inside out and following fabric-specific guidelines, which helps beginners build confidence and scale up to small-batch projects.
Frequently Asked Questions
What are Texas DTF transfers and why are they good for beginners?
Texas DTF transfers are a direct-to-film method where a printed design on a thin film is coated with adhesive powder, cured, and pressed onto fabric with a heat press. They deliver high‑resolution images with bright colors and a soft hand, and they work with standard inkjet printers when paired with the right DTF film and powder, making them ideal for beginners in DIY DTF printing. For best results, mirror the artwork, start with inexpensive blanks, and follow the film manufacturer’s temperature, time, and pressure guidelines. This simple, repeatable workflow helps you test ideas quickly and scale as you gain experience.
How to apply DTF transfers using Texas DTF transfers: a beginner-friendly guide?
To apply DTF transfers, design and mirror your artwork, print onto DTF film (including a white layer if needed for dark fabrics), then apply an adhesive powder and cure it per the powder instructions. Remove excess powder, position the film on the garment, and press with a heat press at the recommended temperature, time, and pressure (for example, around 310–320°F / 154–160°C for 15–20 seconds with medium pressure). Let the fabric cool, then peel the carrier sheet and finish with a short post‑press if advised. Tips for DIY DTF printing include calibrating color and white ink on dark fabrics, maintaining a clean workspace, checking alignment before printing, and following the film manufacturer’s guidelines to ensure durable results.
| Aspect | Key Points |
|---|---|
| What are Texas DTF transfers? | Direct-to-film transfers use a printed image on a thin film coated with adhesive powder, cured, and pressed onto fabric with a heat press. They yield high-resolution, bright colors and a soft hand, remain durable after washing, and work well with standard inkjet printers when paired with the right DTF film and powder. Complex designs can be produced without outsourcing. |
| Why beginner-friendly? | Design once, then print, powder, cure, and press—each step adds reliability. The workflow supports on-demand printing, small-batch testing, quick iteration, and scalable results, making it suitable for beginners and DIY crafters who want repeatable results without heavy outsourcing. |
| Tools, materials, and setup | – Design software and a high-resolution print-ready file (300 dpi or higher) – Inkjet printer compatible with DTF film and white ink – DTF printing film (carrier sheet) – Adhesive powder designed for DTF – Heat source: heat press ideal (household iron for practice) – A curing option (curing oven or heat source) – Parchment/silicone-coated barriers – Cutting tools (scissors or cutting mat) and a squeegee – Clean, dust-free workspace with good ventilation |
| Step-by-step workflow (high level) | Step 1: Design and prepare artwork (bold, color-rich, mirrored for dark fabrics). Step 2: Print mirrored design onto DTF film with proper settings. Step 3: Apply adhesive powder evenly and shake off excess. Step 4: Cure the powder per manufacturer guidelines. Step 5: Remove excess powder and prepare for transfer. Step 6: Press the transfer onto fabric with barrier and correct temp/time/pressure. Step 7: Post-press finishing and optional light cure for durability. |
| Tips for beginners | Test on inexpensive blanks first. Check alignment before printing. Calibrate color and white ink layers for dark fabrics. Use consistent heat and pressure. Maintain a clean workspace to prevent dust and lint from sticking to the film. |
| Common mistakes & troubleshooting | Incomplete adhesion and poor curing. Color shifting or wash-off if curing or washing guidelines aren’t followed. Sticky transfers after washing. White ink coverage issues on dark fabrics. |
| DTF vs other methods | DTF transfers sit between screen printing and DTG in complexity and cost. They offer beginner-friendly flexibility, avoid DTG’s higher equipment costs, and provide vibrant color with a relatively forgiving workflow for DIY enthusiasts. |
| Maintenance & care | Wash inside-out in cold water. Avoid high heat on sensitive fabrics. Store designs flat or rolled. Be aware of matte vs glossy finishes and choose a film to match your aesthetic. Practice consistently with the same materials. |